
Mould Specifications
|
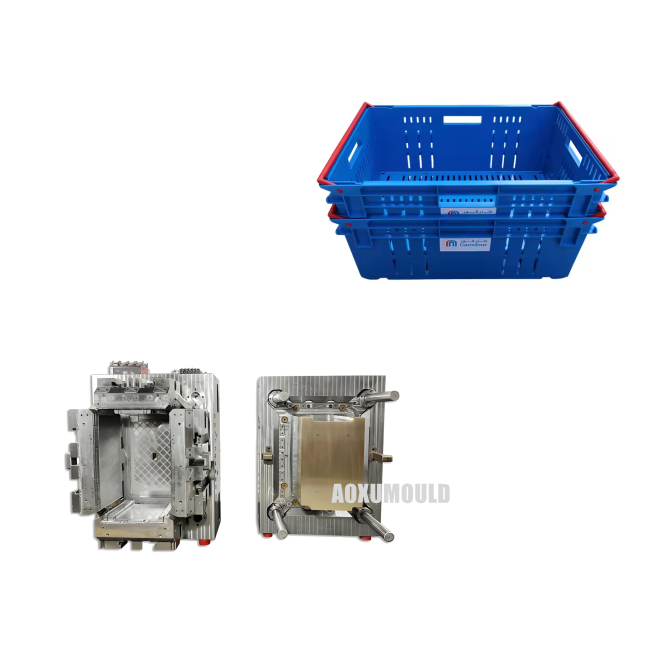
Mould name |
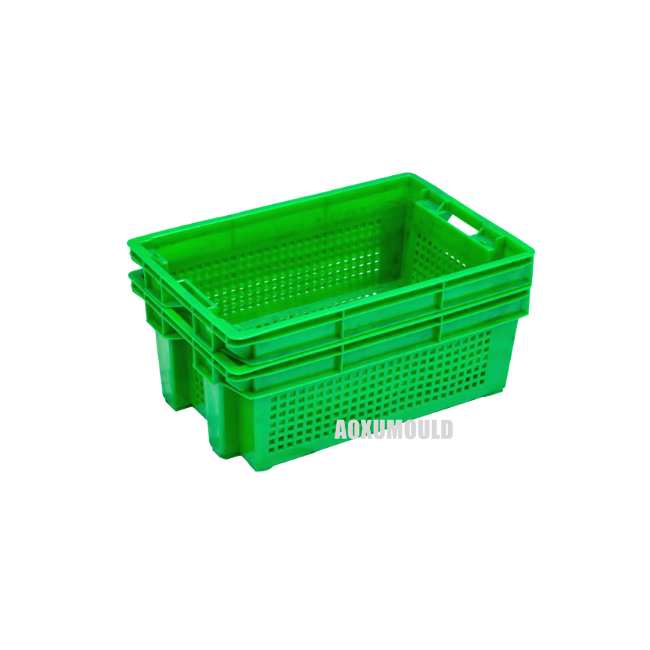
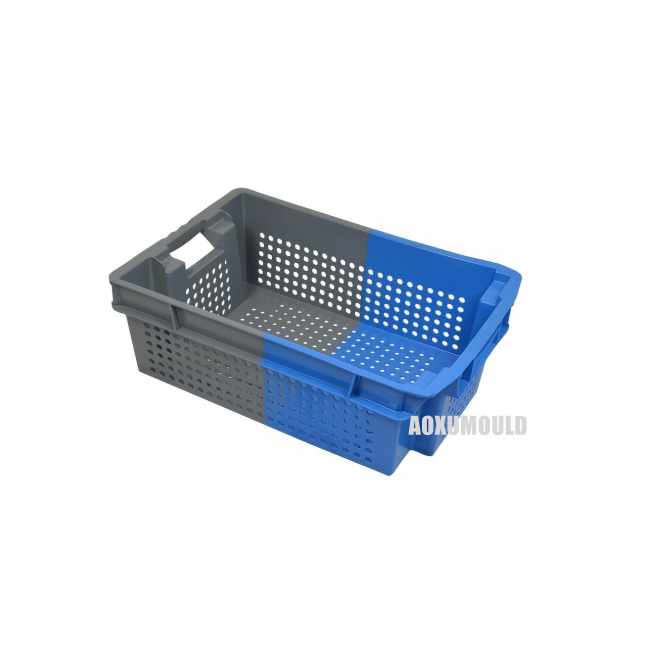
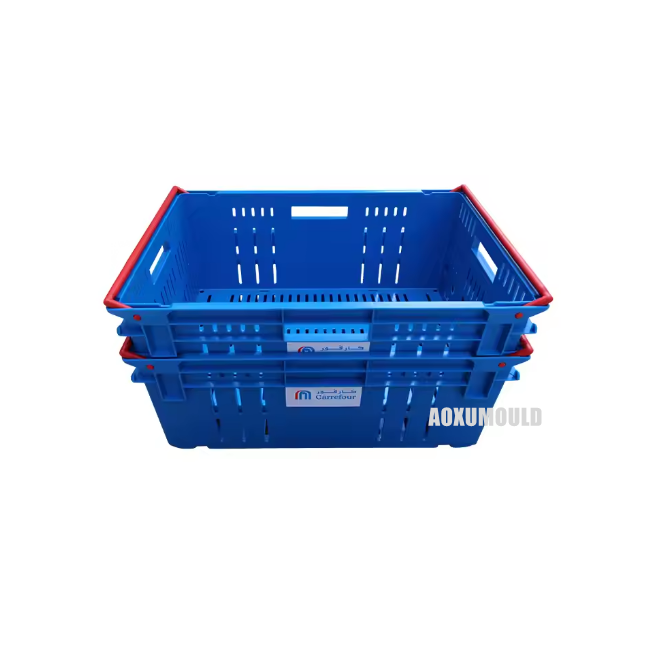
Plastic Nesting Crate Mould |
|
Product material |
HDPE/PP |
|
Product Size |
600 x 400 x 300mm |
|
Mould material for cavity &. Core |
P20/718H/H13/2738 |
|
NOs of cavity |
1 cavity |
|
Injection system |
Hot runner |
|
Suitable injection machine |
480T |
|
Mould size |
1050X780X700mm |
|
Mould weight |
6200KG |
|
Mould lifetime |
more than 500,000pcs |
|
Delivery Time |
50 days |
What's Equipment Do We Need For Plastic Crate Production Line?
1.Raw Material Handling System
Raw material, hopper dryer, automatic loader, mixing blender
2.Molding Equipment
Injection molding machine, mould.
We specialize in designing and manufacturing high-performance injection moulds for different kinds of plastic nesting crates/containers.
3.Cooling &. Demolding
Chiller unit, robotic arm
4.Post-Processing Equipment
Trimming machine, printing system
How Plastic Crates Are Molded?

Plastic nesting crates (also called plastic totes or containers) are typically manufactured through injection molding, a high-efficiency process for mass production.
1.Material Preparation
- Raw Material: Polypropylene (PP) or high-density polyethylene (HDPE) pellets are selected for their durability, lightweight properties, and recyclability.
- Drying: Pellets are dried to remove moisture, ensuring optimal melting and molding performance.
2. Injection Molding Cycle
- Melting: Pellets are fed into an injection molding machine and heated to a molten state (typically 200–300°C).
- Injection: The molten plastic is injected under high pressure into a pre-designed steel mould cavity shaped like the crate.
- Cooling: The mould is cooled rapidly (via water channels) to solidify the plastic into the crate's structure.
- Ejection: Once hardened, the mould opens, and ejector pins push the finished crate out.
3. Mould Design
- Customization: Moulds are precision-engineered to define the crate's size, wall thickness, handles, and stacking features.
4. Post-Processing
- Trimming: Excess plastic (e.g., flash around edges) is removed manually or via automation.
- Quality Checks: Crates are inspected for defects, dimensional accuracy, and load-bearing capacity.
- Optional Add-ons: Features like anti-slip textures, labels, or RFID tags may be added.
5. Automation & Efficiency
Modern facilities use robotic arms to handle moulds and finished products, enabling continuous 24/7 production with minimal waste.
This process ensures plastic crates are robust, lightweight, and ideal for logistics, agriculture, or retail use.
How To Design The Structure of A Plastic Nesting Crate Mould?

Designing a plastic nesting crate mould involves a systematic approach to ensure functionality, manufacturability, and efficiency. Here's a structured breakdown:
1. Part Design Considerations
- Tapered Walls: Implement a 1–3° draft angle on vertical walls to facilitate demolding and enable nesting. Balance draft angle to avoid excessive space between nested crates.
- Uniform Wall Thickness: Maintain 2–4mm thickness (adjust based on material, e.g., PP or HDPE) to prevent defects. Ribs should be 50–70% of wall thickness with 0.5–1° draft.
- Structural Reinforcements: Add ribs to the base and sides for strength. Align ribs with the demolding direction and ensure proper draft.
- Handles/Stacking Features: Design handles as radiused cutouts to avoid stress concentrations. Include interlocking rims/lips for stable stacking.
2. Mould Structure Design
- Core and Cavity: Split mold into two halves (core for inner surfaces, cavity for outer). Ensure parting line placement minimizes flash visibility (e.g., along crate edges).
- Venting: Integrate shallow vents (0.02–0.04mm) at the parting line and deep ribs to prevent air traps.
- Cooling System: Use conformal cooling channels near thick sections (e.g., ribs) for uniform cooling. Consider baffles/bubblers for deep areas.
- Ejection System: Position ejector pins under ribs and edges for even force distribution. Use stripper plates for large surfaces if needed.
-Gating: Opt for edge gates to ensure even fill and minimize visible marks. Avoid center gates unless necessary for symmetry.
3. Material and Manufacturing
- Mold Material: Choose P20/H13 steel for high-volume production; aluminum for prototypes/low volumes.
- Shrinkage Compensation: Scale mold dimensions by material shrinkage (e.g., 1.5–2% for PP).
- Surface Finish: Apply texture to hide ejector marks and improve grip. Avoid high-gloss finishes.
4. Validation and Testing
-Simulation: Use mould flow analysis to predict filling patterns, cooling, and potential defects (weld lines, warpage).
- Prototyping: Test with 3D-printed or soft molds to verify nesting, strength, and ergonomics.
- Tolerances: Ensure tight tolerances for interlocking features to guarantee consistent nesting.
5. Avoiding Complexity
- Undercuts: Design handles as simple cutouts without undercuts to eliminate the need for slides/lifters.
- Simplified Ejection: Optimize draft angles and ejector placement to avoid sticking.
Is A Hot Runner System Needed For Plastic Nesting Crate Injection Moulds?

The decision to use a hot runner system in plastic crate injection moulds depends on:
1. Production Volume
- Hot Runner Recommended: For long-term, high-volume production (e.g., 100k+ units), it reduces material waste, shortens cycle time, and lowers costs.
- Cold Runner Sufficient: For small batches or simple molds, cold runners offer lower upfront costs.
2. Product Design
- Plastic crates are typically thin-walled and structurally simple. A hot runner ensures uniform melt distribution, minimizing defects like sink marks or warpage.
- Hot runners excel in multi-gate designs by balancing melt flow.
3. Cost vs. Efficiency
- Hot Runner Pros: Eliminates runner scrap, speeds up cycles, reduces post-processing.
- Hot Runner Cons: Higher mold cost, complex maintenance, and precise temperature control requirements.
Mould Components
Mould Steel

Hot Runner System

Standard Parts

Package &. Delivery

How To Maintain Plastic Crate Injection Moulds?
Proper maintenance of plastic crate injection moulds is critical for ensuring product quality, extending mould lifespan, and reducing production downtime. Follow these guidelines for effective mold care:
1. Daily Maintenance
A. Clean After Use:
- Remove residual plastic, dust, or debris from the mould surface, cavities, and vents using soft brushes or compressed air.
- Avoid abrasive tools to prevent surface scratches.
B.Lubrication:
- Apply a thin layer of high-temperature-resistant lubricant to guide pins, ejector pins, and sliding components.
- Use non-silicone lubricants to avoid contamination.
C.Inspect for Damage:
- Check for wear, cracks, or corrosion on critical components (e.g., cores, cavities, ejector systems).
- Address minor issues immediately to prevent escalation.

2. Periodic Deep Cleaning
A. Disassemble Components:
- Regularly dismantle ejector pins, sliders, and cooling channels for thorough cleaning.
- Use ultrasonic cleaning or specialized mould cleaners for stubborn residues.
B.Cooling System Maintenance:
- Flush cooling channels to prevent scale buildup or blockages.
- Ensure consistent coolant flow to avoid overheating.
3. Corrosion Prevention
A.Apply Anti-Rust Coatings:
- Use rust inhibitors or protective sprays on mold surfaces, especially during long-term storage.
- Control Humidity:
- Store molds in a dry, temperature-controlled environment (ideal humidity: <50%).
4. Alignment & Calibration
A. Check Mold Alignment:
- Verify proper alignment of mold halves to prevent uneven wear or flashing.
- Use precision tools (e.g., dial indicators) for adjustments.
B. Monitor Clamping Force:
- Ensure optimal clamping pressure to avoid mold deformation.
5. Repair & Replacement
- Fix Minor Damage Promptly:
- Repair scratches or dents using polishing or EDM (electrical discharge machining).
- Replace Worn Parts:
- Timely replace aging ejector pins, bushings, or seals to maintain functionality.
6. Storage Best Practices
A.Protect Mold Surfaces:
- Coat surfaces with mold release agent or anti-rust oil before storage.
B.Use Support Blocks:
- Insert wooden/metal blocks between mold halves to relieve tension on components.
7. Documentation &. Training
- Maintain Logs:
- Record maintenance dates, issues, and repairs for traceability.
- Train Operators:
- Ensure staff follow proper handling procedures and safety protocols.
Customers' Feedback

Customers' Feedback
Why Choose Us for Your Plastic Nesting Crate Injection Moulds?
1. Expertise &. Precision Engineering
With over 16 years of specialized experience in injection mould design and manufacturing, we deliver high-precision, durable moulds tailored for plastic crates. Our engineering team combines cutting-edge CAD/CAM technology with hands-on industry knowledge to optimize mould performance, ensuring flawless production cycles and extended tool lifespan.
2. Custom Solutions for Every Need
Whether you require stackable crates, vented designs, heavy-duty containers, or industry-specific features, we craft molds that align with your exact specifications. Our collaborative approach ensures your design vision becomes reality.
3. Cost-Effective Production
We leverage advanced materials and streamlined processes to reduce long-term costs. Our moulds minimize material waste, accelerate cycle times, and support high-volume output-maximizing your ROI.
4. Quality Guaranteed
Rigorous QA/QC protocols at every stage-from prototyping to final testing-ensure defect-free molds. We prioritize durability, dimensional accuracy, and ease of maintenance.
5. Fast Turnaround, Global Reach
Agile production workflows and a proven track record of on-time delivery, even for complex projects. We serve clients worldwide, offering end-to-end support from design to after-sales service.
6. Sustainability-Driven Innovation
We design molds for recyclable materials (e.g., PP, HDPE) and energy-efficient manufacturing, helping you meet eco-friendly goals without compromising strength or functionality.


