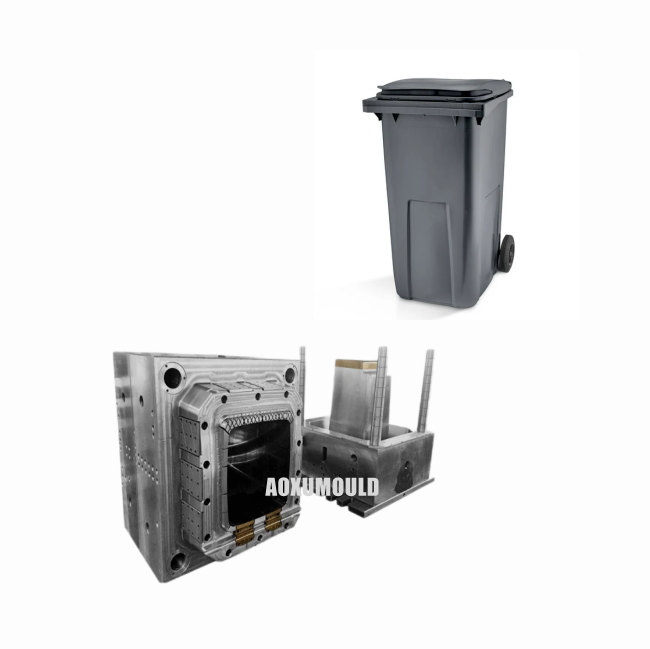

Mould Specifications
|
Mould name |
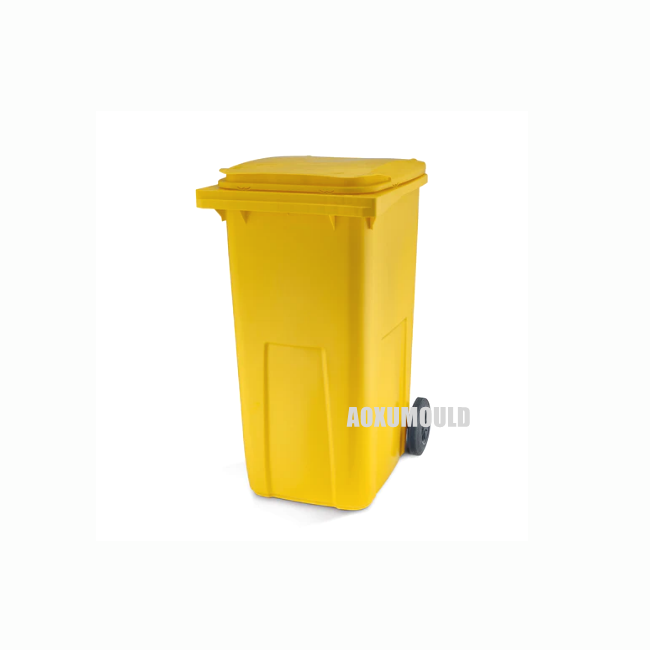
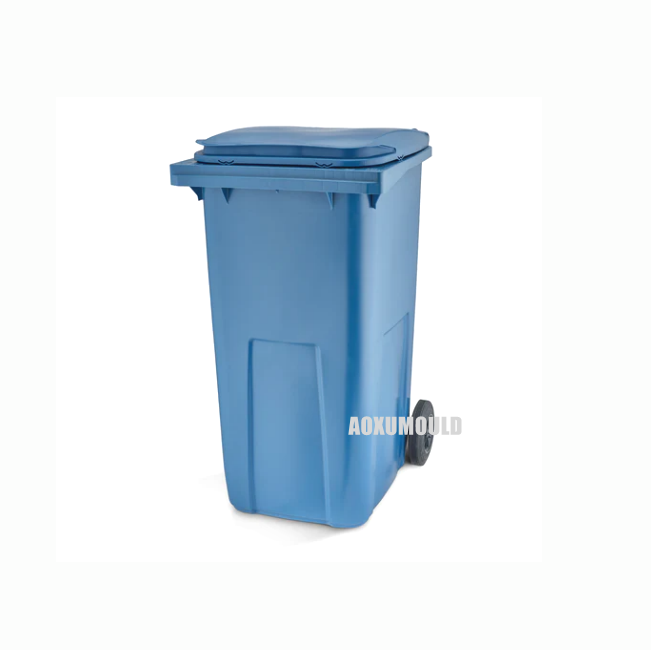
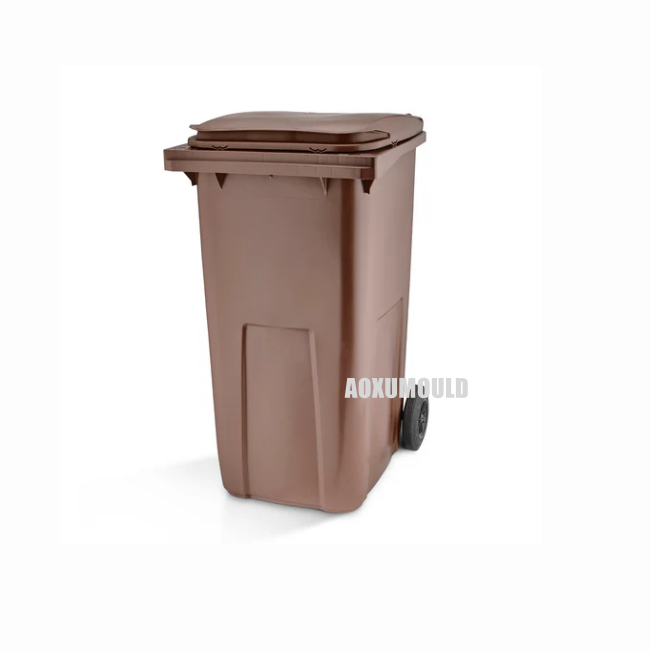
240 Litre Wheel Dustbin Mould |
|
Product material |
PP/HDPE, plastic |
|
Product Size |
1079 x 583 x 737 mm |
|
Wheel diameter (mm) 2 rubber wheels Ø 200 |
|
|
Product weight |
12kg |
|
Mould material for cavity &. Core |
C45, P20, 718, 2738 |
|
Mould base |
C45 |
|
Injection system |
Hot runner open gates or valve gates |
|
Suitable injection machine |
2400T |
|
Mould size |
1850x1300x1200mm |
|
Mould lifetime |
More than 300,000pcs |
How To Make Mould For 240 Litre Wheel Dustbins?

Making a 240 litre wheel dustbin mould is a challenging but rewarding process. With the right tools, materials, and techniques, you can create a high-quality mould that produces durable and reliable dustbins.
1. Design the Mould
Before you start making the mould, you need to design it. This involves determining the shape and dimensions of the dustbin, as well as the number and location of any necessary injection points.
2. Prepare the Materials
Once you have your design, you need to prepare the materials. This includes selecting the appropriate plastic resin, as well as any additives or reinforcements.
3. Build the Mould
Now it's time to start building the mould itself. This typically involves creating a pattern or prototype of the dustbin, and then using that to create the mould. You can use a variety of materials to make the mould, including aluminum, steel, or fiberglass.
4. Inject the Plastic Resin
Once the mould is complete, you can inject it with the plastic resin. This process involves heating the resin so it becomes molten, and then injecting it into the mould through the injection points. You'll need to let the resin cool and solidify before removing the newly-formed dustbin from the mould.
5. Finishing Touches
Finally, you'll want to add any finishing touches to the dustbin. This may include trimming off any excess plastic, adding a handle or latching mechanism, or engraving a brand or logo onto the surface.
Throughout the entire process, it's important to work carefully and methodically to ensure a high-quality mould and dustbin. With patience, attention to detail, and a positive attitude, you can successfully make a 240 litre wheelie dustbin mould and create sturdy, reliable dustbins for years to come.
Moldflow Analysis For 240L Dustbin Mould

Moldflow analysis is an essential step in the design and manufacturing process of plastic products. In the case of a 240L dustbin mold, Moldflow analysis can help identify potential issues that may arise during the production process and allow for early adjustments to improve the final product's quality.
The purpose of Moldflow analysis is to simulate the fill, pack, and cooling phases of the injection molding process. By using specialized software and 3D modeling, Moldflow analysis can show the flow of plastic material, identify potential weld lines, air traps, and warpage problems, as well as determine optimal cooling time and location.Using Moldflow analysis for a 240L dustbin mold can help ensure that the finished product will meet or exceed all performance and quality criteria. By simulating the filling process, we can optimize the placement of the injection gates and control the flow of the molten plastic material to minimize warping, short shots, and other problems.
During the packing phase, Moldflow analysis can help identify high-pressure areas and optimize the size and shape of the runners and gates to avoid over-packing, flash, or sink marks. By analyzing the cooling phase, Moldflow allows us to identify potential hot spots and cooling imbalances in the mold cavity, which could lead to warpage issues.
Overall, Moldflow analysis is a valuable tool that can help ensure the success of any injection molding project, including the production of a 240L dustbin mold. By utilizing Moldflow analysis, we can identify and solve potential problems early in the design process, resulting in a more efficient, cost-effective, and high-quality production process.
Design For Product &. Mould

The Machining of Making Plastic Injection moulds


Injection moulds are widely used in various industrial fields to manufacture plastic parts. However, the production of injection moulds is a complex process that requires precision and accuracy in every step. The machining of injection moulds is one such critical step that ensures the proper functioning of the moulds.
Machining of injection moulds includes a range of processes such as milling, drilling, grinding, and other operations to shape the mould according to the specifications. The machining process aims to remove excess material from the mould and create cavities and cores that determine the shape and size of the final plastic product.
The machining process requires skilled professionals who have expertise in interpreting design drawings and using high-precision tools and machines. The selection of the right tools and techniques is crucial to create moulds that can produce high-quality plastic parts efficiently.
The machining of injection moulds is essential because even a small error in the mold can result in a defective product. Therefore, the mould must be manufactured with high accuracy to avoid any product deformation or malfunction. The advanced CNC machines used in the machining process ensures greater precision and accuracy.
In summary, the machining of injection molds is a crucial step in the production process that requires precision and expertise. The manufacturing of high-quality moulds ensures successful and efficient production of plastic parts. As technology advances, the machining process is becoming more efficient, and the use of modern techniques and tools is improving the quality of plastic injection moulds.
Mould Try-out of 240Litres Plastic Dustbin Mould
Package &. Delivery

Mould Components
Mould Steel

Hot Runner System

Standard Parts

How To Maintain Our Dustbins Moulds?
Maintaining mould is essential to keep it in top working condition. By practicing proper maintenance techniques, you can extend the lifespan of your mould and prevent problems from arising.
Here are some tips for maintaining your dustbins moulds:
1. Keep the mould clean: Regular cleaning of the mould is essential to prevent build-up of residue, dirt or debris that can cause damage. Use a mild detergent and water solution to clean the mould and wipe it dry.

2. Lubricate the mould regularly: Make sure to lubricate all moving parts on the mould to prevent friction and wear. Use a manufacturer recommended lubricant and follow the inclusion directions.

3. Inspect the mould regularly: Regular inspection of the mould will help to identify any damage or wear and tear. Replace any damaged or worn parts immediately to prevent further issues.
4. Store the mould properly: When the mould is not in use, store it in a cool, dry place away from direct sunlight and moisture. Avoid stacking the moulds on top of each other as this may cause damage.
5. Use the mould as recommended: Always use the mould according to the manufacturer's instructions. Avoid overloading the moulds or exposing them to extreme heat or cold temperatures.
By following these simple maintenance tips, you can ensure the longevity of your plastic dustbin mould. A well-maintained mould will last longer and perform better than one that is neglected. So, take the time to care for your mould and enjoy long-lasting performance.
FAQ
Q: What material is the 240L wheel dustbin mould made of?
Q: How long does it take to produce a set of dustbin mould?
Q: How many cavities can the 240L dustbin mould support?
Q: Can I customize the design of the dustbin mould?
Q: Is the mould easy to use?
Q: What is the production capacity of our mould?
Q: Do you offer warranty for the 240L wheelie dustbin mould?
Q: What is the cost of the 240L bin mould?
Customers' Feedback


