

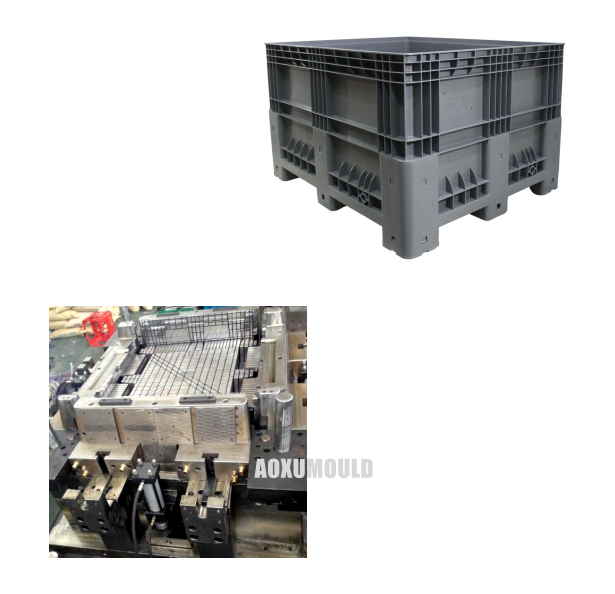
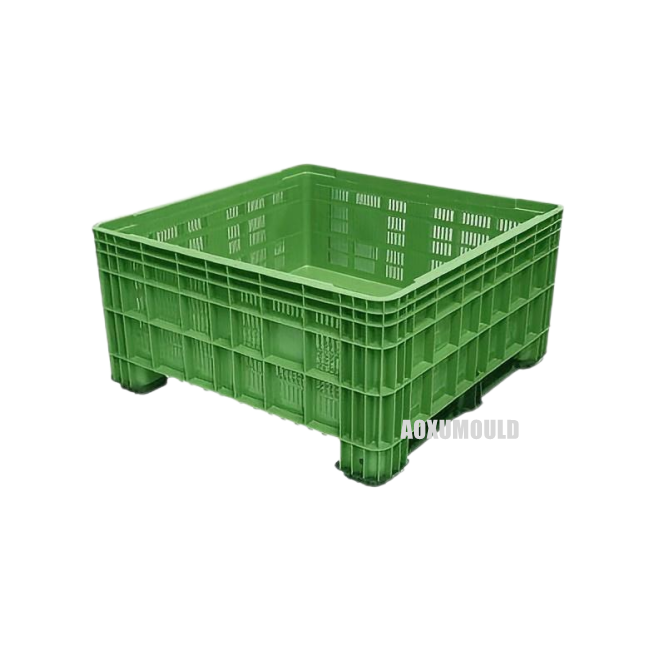
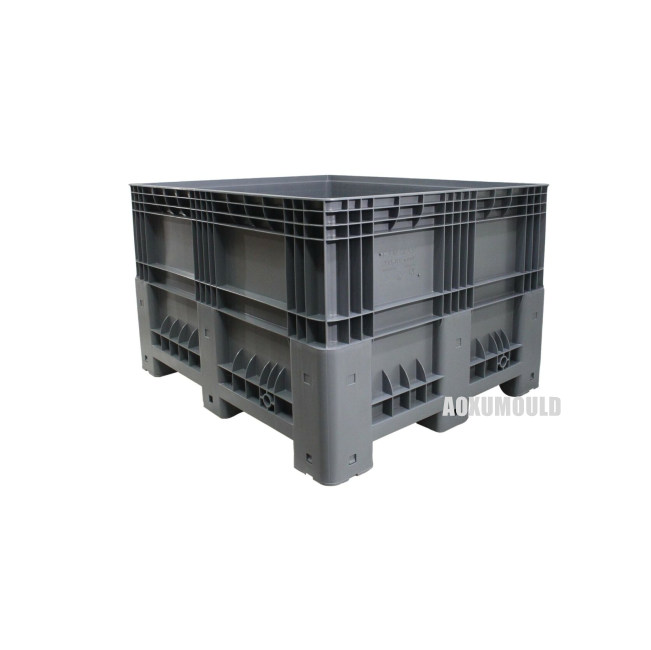
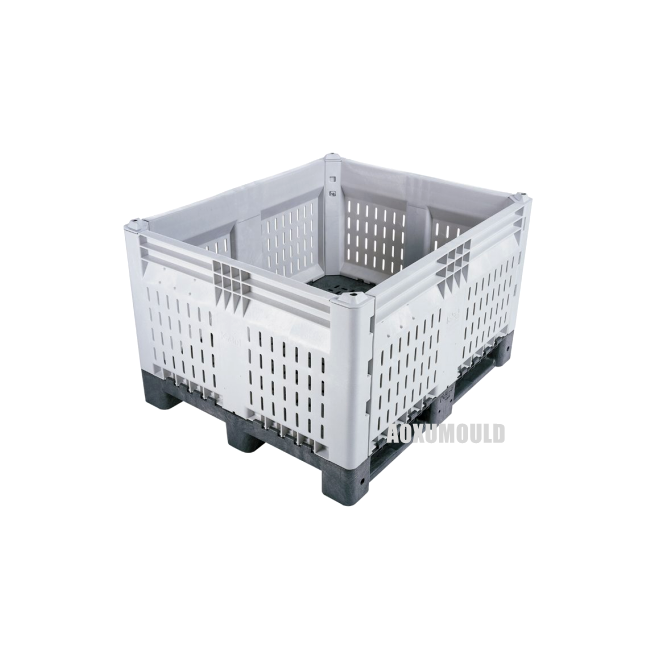
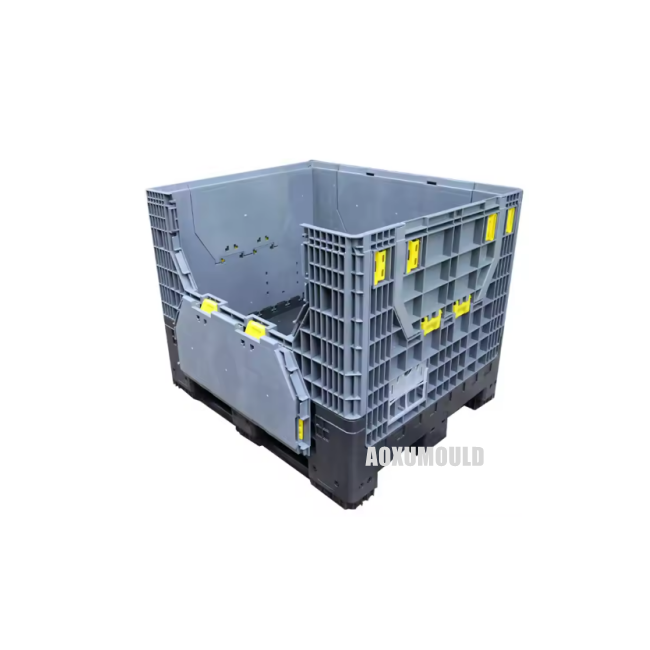
Mould Specifications
|
Mould name |
Plastic Pallet crate mould |
|
Product material |
PP/HDPE |
|
Product Size |
1200 x 1200 x 730mm |
|
Mould material for cavity &. Core |
P20/718H/H13/2738 |
|
NOs of cavity |
1 cavity |
|
Injection system |
Hot runner |
|
Suitable injection machine |
4500T |
|
Mould size |
1750X1750X1350mm |
|
Mould lifetime |
more than 500,000pcs |
|
Delivery Time |
75 days |
The Function of Pallet Crates

The functions and roles of plastic pallet crates can be summarized in English as follows:
1. Transportation and Storage
- Designed for efficient movement and storage of goods in logistics and supply chains.
- Compatible with forklifts, pallet jacks, and automated systems.
2. Protection of Goods
- Provides structural support to prevent damage during handling and transit.
- Resistant to impacts, moisture, and environmental factors.
Stackability
- Stackable design maximizes vertical storage space in warehouses and vehicles.
- Ensures stability during transportation.
4. Reusable and Durable
- Long-lasting material reduces waste compared to single-use packaging.
- Suitable for multiple cycles of use in closed-loop supply chains.
5. Hygienic and Easy to Clean
- Non-porous surface ideal for food, pharmaceuticals, and hygiene-sensitive industries.
- Resists mold, bacteria, and chemical corrosion.
6. Compatibility with Automation
- Standardized dimensions work seamlessly with conveyor belts, robotic systems, and palletizing equipment.
7. Environmental Resistance
- Withstands extreme temperatures, UV exposure, and harsh conditions.
8. Cost-Effective
- Lowers long-term costs by replacing disposable packaging and reducing product damage.
9. Compliance with Standards
- Meets international logistics and safety regulations.
10. Versatility
- Used across industries like agriculture, automotive, retail, and manufacturing.
How to Manufacture Large-Scale Pallet Crates Moulds?
Producing large-scale plastic pallet crate moulds requires precision engineering, advanced manufacturing techniques, and meticulous quality control. Below is a step-by-step guide to the process, optimized for industrial applications:
1. Design &. Engineering
- 3D Modeling: Use CAD software to design the mold structure, including core/cavity, cooling channels, ejector system, and venting.
- Structural Analysis: Perform finite element analysis (FEA) to ensure rigidity, minimize warpage, and optimize material flow.
- Draft Angles & Tolerances: Incorporate draft angles (1–3°) for demolding and define tight tolerances for high-volume production.
2. Material Selection
- Mould Base: Use pre-hardened steel (e.g., P20, 718H) or hardened tool steel (H13) for durability.
- Surface Treatment: Apply coatings to enhance wear resistance and reduce cycle time.
- Inserts: For high-wear areas, use carbide or beryllium copper inserts.
3. CNC Machining
- Rough Machining: Mill the mold base to near-net shape using large-scale CNC machines.
- Precision Finishing: Achieve mirror-like cavity surfaces via high-speed machining (HSM) or EDM (electrical discharge machining) for complex geometries.
- Cooling Channels: Drill conformal cooling channels using deep-hole drilling or laser sintering (for additive-manufactured inserts).
4. Assembly &. Fitting
- Core/Cavity Alignment: Use guide pins, bushings, and hydraulic/pneumatic systems for precise alignment.
- Ejection System: Install ejector pins, sleeves, and plates to ensure smooth demolding.
- Hot Runner Integration: For multi-cavity moulds, incorporate hot runner systems (e.g., Husky, Mold-Masters) to minimize material waste.
5. Testing &. Validation
- Trial Injection: Conduct mold trials on industrial injection molding machines.
- Parameter Optimization: Adjust temperature (180–300°C), pressure (80–120 MPa), and cooling time to eliminate defects (sink marks, flash).
- Durability Testing: Simulate 50,000+ cycles to validate mould lifespan under production conditions.
6. Post-Processing
- Surface Polishing: Achieve SPI A1 (mirror finish) or textured surfaces via chemical etching or laser engraving.
- Final QC: Inspect dimensions with CMM (coordinate measuring machines) and verify functionality via sample production.
What's The Size of Injection Molding Machine For Plastic Pallet Crate Mould?

To determine the appropriate size of an injection molding machine for producing plastic pallet crates, key factors include clamping force (tonnage) and injection volume. Below is a step-by-step explanation in English:
1. Critical Parameters for Machine Selection
a. Clamping Force (Tonnage)
The clamping force required depends on the projected area of the part and the material injection pressure.
- Projected Area: Length × Width of the crate (including mould cavity layout).
- Material Pressure:
- PP (Polypropylene): 300–400 bar
- HDPE (High-Density Polyethylene): 400–500 bar
b. Injection Volume
The machine must provide sufficient shot capacity to fill the crate's volume (including runners and gates).
- Calculate the crate's weight (e.g., 3–8 kg for a standard pallet crate) and ensure the machine's shot capacity exceeds this.
2. Example Calculation
Assume a crate size of 1200 × 800 × 150 mm (L × W × H) made of PP:
(For HDPE, this could rise to 4800+ tons due to higher pressure requirements.)
3. Injection Volume:
If the crate weighs 5 kg, select a machine with a shot capacity ≥6 kg (to account for runners).
3. Typical Machine Requirements
- Small/Medium Crates (e.g., 600 × 400 mm):
- Clamping Force: 800–1500 tons
- Shot Capacity: 3–6 kg
- Large Crates (e.g., 1200 × 800 mm):
- Shot Capacity: 8–15 kg
4. Additional Considerations
- Mould Complexity: Multi-cavity moulds or complex geometries may increase tonnage.
- Material Flow: High-viscosity materials (e.g., HDPE) require higher pressure.
- Cycle Time: Larger machines may slow production if oversized.
How To Molding A Plastic Pallet Crate?
Mould Components
Mould Steel

Hot Runner System

Standard Parts

Maintenance Guide for Large Plastic Pallet Crate Moulds
Proper maintenance of large plastic pallet crate moulds is essential to ensure product quality, extend mould lifespan, and reduce production costs. Follow these guidelines for effective care:
1. Regular Cleaning
- Remove residual plastic, debris, or contaminants from the mold surface and cavities after each production cycle.
- Use non-abrasive cleaning tools (e.g., soft brushes, air blowers) to avoid scratching the mould.
- For stubborn residues, apply mold-safe solvents approved by the manufacturer.
2. Lubrication
- Apply high-temperature-resistant lubricants to moving parts (e.g., sliders, ejector pins, guide rails) to reduce friction and wear.
- Avoid over-lubrication to prevent attracting dust or interfering with product quality.
3. Rust Prevention
- Store molds in a dry, temperature-controlled environment to avoid moisture exposure.
- Apply anti-corrosion coatings or silica gel desiccants during long-term storage.
- Inspect for rust spots regularly, especially on steel components.
4. Storage Best Practices
- Disassemble and store moulds in protective cases or racks to prevent deformation.
- Use wooden or foam supports to avoid direct contact with hard surfaces.
- Label moulds clearly for easy identification and tracking.
5. Inspection &. Repairs
- Conduct routine checks for cracks, wear, or misalignment in critical areas (e.g., gates, cooling channels).
- Address minor damages immediately to prevent escalation.
- Partner with professional mould repair services for complex issues.
6. Temperature Control
- Ensure proper cooling/heating system performance to avoid thermal stress.
- Clean cooling channels periodically to prevent blockages from scale or deposits.
7. Operational Guidelines
- Avoid overloading the mould beyond its designed capacity.
- Follow recommended injection pressure and cycle times during production.
8. Documentation
- Maintain a maintenance log to record cleaning schedules, repairs, and part replacements.
- Track mould usage cycles to plan preventive maintenance.
9. Surface Protection
- Apply protective coatings (e.g., Teflon, nickel plating) to high-wear surfaces if required.
- Polish mould surfaces periodically to maintain smooth finishes.
Package &. Delivery

Customers' Feedback


