

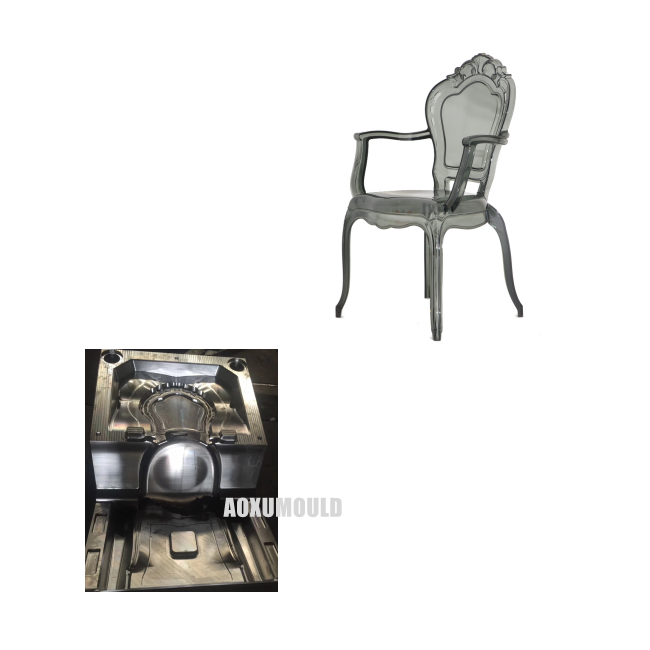
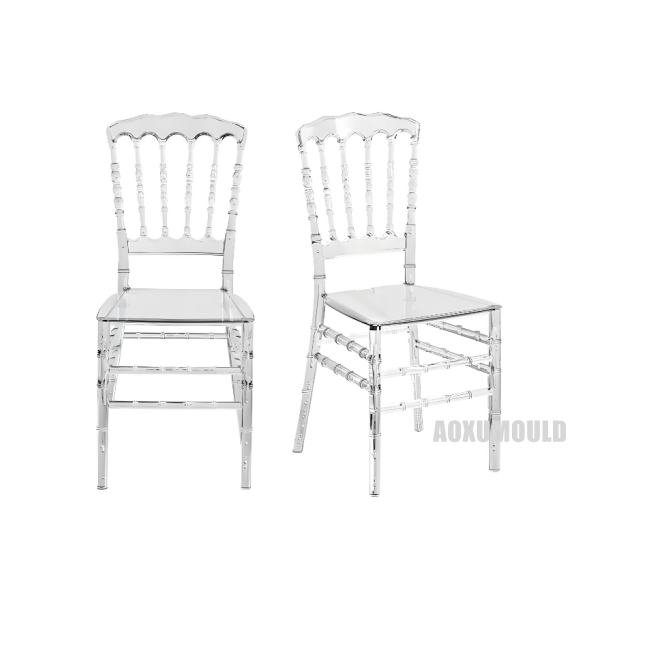
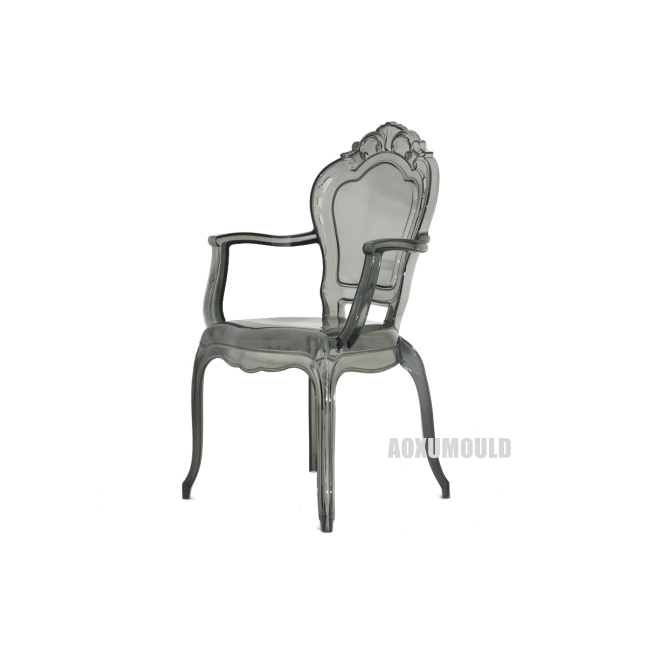
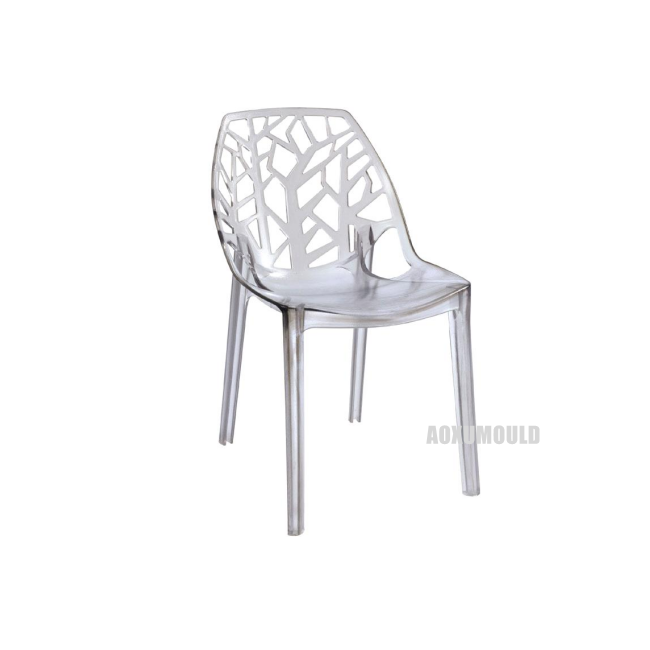
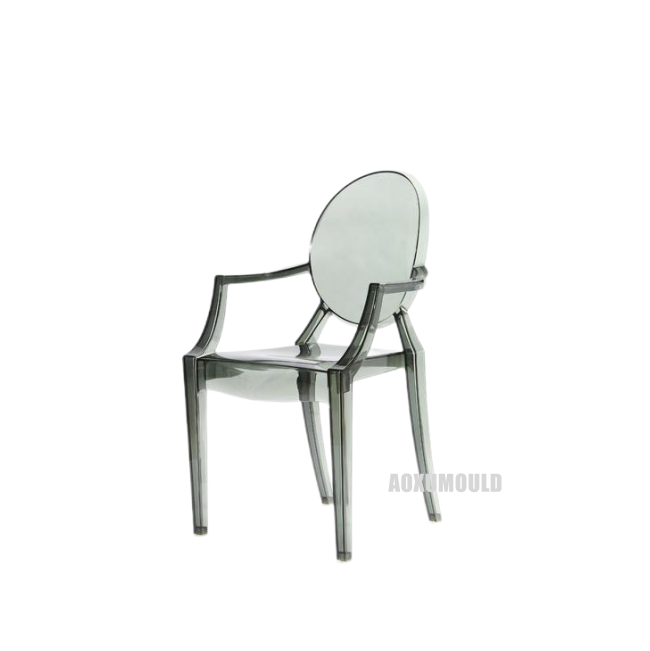
Mould Specifications
|
Mould name |
Plastic Acrylic chair mould |
|
Product material |
Plastic, Acrylic, PMMA, PC |
|
Product Size |
380x450x900mm |
|
Mould material for cavity &. Core |
718 |
|
NOs of cavity |
1 cavity |
|
Injection system |
Cold runner |
|
Suitable injection machine |
1000T |
|
Mould size |
1200X885X950mm |
| Mould Weight | 8000kg |
|
Mould lifetime |
more than 500,000pcs |
|
Delivery Time |
50 days |
Why Acrylic Chairs Are Sometimes Called Tiffany Chairs?

The term "Tiffany chair" is often used to describe clear acrylic chairs, particularly in event and wedding contexts. The naming likely stems from a combination of factors:
1. Association with Elegance: The name "Tiffany" evokes the luxury and sophistication of Tiffany & Co., the renowned jewelry brand. Using "Tiffany" as a descriptor implies a high-end, stylish aesthetic, aligning with the chairs' sleek, modern design.
2. Marketing Strategy: Event rental companies and manufacturers may adopt the name to enhance appeal. Labeling chairs as "Tiffany" adds a touch of glamour, making them more desirable for upscale occasions like weddings or formal events.
3. Visual Similarity to Crystal/Glass: Acrylic chairs' transparency can resemble crystal or glass, materials often linked to luxury brands like Tiffany & Co. This visual connection reinforces the perception of elegance.
4. Genericized Term: Over time, "Tiffany chair" may have become a generic term for clear, minimalist chairs, despite no direct historical link to the Tiffany brand or its designers. This mirrors how brand names like "Kleenex" become colloquial terms for product categories.
Notably, there is no direct connection to Louis Comfort Tiffany (known for stained glass lamps) or Tiffany & Co.'s products. The name primarily serves as a marketing tool to convey sophistication, rather than denoting a specific design lineage.
What Is Material Acrylic?

Acrylic (PMMA) Plastic: Key Features
- Material: Polymethyl Methacrylate (PMMA), also known as acrylic glass.
- Advantages:
- Optical clarity (92% light transmission) with UV resistance.
- 50% lighter than glass and shatter-resistant.
- Easily fabricated via laser cutting, thermoforming, or polishing.
- Superior weatherability for indoor/outdoor applications.
- Typical Applications:
- Signage & Display: LED light panels, retail fixtures.
- Architecture: Noise barriers, skylights.
- Automotive: Interior lenses, headlight covers.
- Consumer Goods: Aquariums, modern furniture.
Note:Acrylic is less impact-resistant than polycarbonate (PC) but offers better scratch resistance and cost efficiency.
How To Make Plastic Acrylic Chair Mould?
Creating a mould for a plastic acrylic chair involves precision engineering and an understanding of injection moulding processes. Below is a step-by-step guide to making a mould for an acrylic chair:

1. Design the Chair
- 3D Modeling: Use CAD software (e.g., UG, AutoCAD) to design the chair, ensuring ergonomic proportions and structural integrity.
- Draft Angles: Incorporate slight angles (1–3°) on vertical surfaces to allow the chair to release smoothly from the mould.
- Wall Thickness: Maintain uniform thickness (4–6 mm) to prevent warping or sink marks during cooling.
2. Choose Mould Material
- Mould Steel:
- Steel: Durable for high-volume production (e.g., P20, H13 steel).
- Surface Finish: Polished to a mirror-like finish for the acrylic's clarity.
3. CNC Machining the Mould
- Split the Mould: Divide the design into two halves (core and cavity) for injection.
- CNC Milling: Machine the mould blocks from steel/aluminum using CNC machines based on the CAD design.
- Cooling Channels: Integrate channels into the mould to circulate coolant and ensure even cooling.
4. Surface Treatment
- Polishing: Polish the mould cavity to a high gloss (Ra < 0.1 µm) for a crystal-clear acrylic finish.
- Texturing (Optional): Add textures if a frosted or patterned surface is desired.
5. Injection Moulding Setup
- Material Preparation: Use PMMA (acrylic) pellets, dried to remove moisture (2–4 hours at 80°C).
- Injection Moulding Machine
6. Testing and Adjustments
- Trial Run: Inject a few test pieces to check for defects (e.g., bubbles, warping, incomplete filling).
- Adjustments:
- Modify injection speed, pressure, or temperature.
- Fine-tune cooling channels or polish the mould further.
7. Post-Processing
- Demoulding: Eject the chair carefully to avoid scratches.
- Trimming: Remove excess material (flash) from the edges.
- Polishing: Buff the acrylic chair to restore clarity.
Key Considerations
- Venting: Add small vents to the mould to release trapped air and prevent bubbles.
- Shrinkage: Account for PMMA's shrinkage rate (~0.5%) in the mould design.
- Ejector Pins: Place pins strategically to avoid damaging the chair during demoulding.
By following these steps, you can create a mould capable of producing sleek, transparent acrylic chairs. For small-scale projects, consider 3D printing a prototype mould from resin.
How To Molding A Acrylic Chair?
Injection molding an acrylic chair involves a detailed process to ensure quality and clarity. Here's a structured approach:
1.Material Preparation
- Drying: Dry PMMA pellets at 80–90°C for 2–4 hours to prevent moisture-induced bubbles.
2. Machine Setup
- Temperatures:
- Barrel: 220–250°C (higher than many plastics).
- Mould: 50–80°C to balance flow and cooling.
- Pressure &. Speed: Moderate injection speed (50–100 mm/s) to avoid stress; pressure adjusted for part thickness.
-Clamping Force: Ensure sufficient force (based on projected area) to keep the mould closed.
3. Injection Process
- Filling: Inject acrylic into the mould, using multiple gates for even distribution in large parts.
- Packing & Holding: Apply pressure to fill cavities completely and compensate for shrinkage.
- Cooling: Allow adequate time (minutes, depending on thickness) for solidification.
4. Demolding
- Ejection: Use ejector pins carefully to avoid stress marks. Automate with robots for efficiency.
- Handling: Remove the part gently to prevent cracking.
5.Post-Processing
- Trimming: Remove sprues and flash with precision tools.
- Polishing: Flame polish edges or use mechanical buffing for clarity.
- Annealing: Heat to 70–80°C for 2–4 hours, then cool slowly to relieve internal stresses.
6.Quality Control
- Visual Inspection: Check for bubbles, cracks, and clarity.
- Dimensional Checks: Verify size and structural integrity.
- Stress Testing: Ensure the chair meets load-bearing requirements.
7.Troubleshooting Common Issues
- Bubbles: Ensure thorough drying of pellets.
- Weld Lines: Optimize gate placement and injection speed.
- Sink Marks: Adjust packing pressure and cooling time.
8. Safety &. Automation
- Protective Gear: Use heat-resistant gloves and eye protection.
- Automation: Integrate robotics for demolding and handling to enhance safety and efficiency.
Conclusion
This process balances technical precision with material-specific considerations for acrylic. Collaboration with experienced mould designers and thorough testing are key to achieving a high-quality, transparent chair.
Package &. Delivery

Mould Components
Mould Steel

Hot Runner System

Standard Parts

How To Maintain Plastic Transparent Acrylic Chair Mould?
Maintaining transparent acrylic chair moulds requires careful handling and regular upkeep to preserve clarity, structural integrity, and longevity. Below are key practices:
1. Cleaning
After each use, clean moulds thoroughly to remove residues. Use a mild, non-abrasive detergent and warm water. Avoid harsh chemicals (e.g., ammonia, solvents) that may cloud or degrade the material. Soft microfiber cloths or sponges prevent scratches. For stubborn debris, gently scrub with a plastic-safe brush. Rinse with distilled water to minimize mineral deposits and dry with lint-free towels to avoid water spots.
2. Storage
Store moulds in a cool, dry environment away from direct sunlight, as UV exposure can cause yellowing or brittleness. Stack moulds vertically or on padded racks to prevent warping. Use protective covers or foam separators to avoid scratches during storage or transport. Ensure the storage area is free from sharp objects or heavy items that could damage the surface.
3. Inspection &. Maintenance

Regularly inspect for cracks, scratches, or cloudiness. Minor scratches can be polished with a plastic-safe abrasive compound. Avoid excessive heat (e.g., steam cleaning) to prevent deformation. Apply a silicone-based mould release agent before each use to reduce adhesion stress and extend lifespan.
4. Handling
Avoid dropping or stacking heavy items on moulds. Use gloves to prevent fingerprints and oils from transferring to surfaces. For long-term storage, apply a UV-protective coating to mitigate degradation.
By adhering to these steps, transparent chair molds retain optical clarity and durability, ensuring consistent product quality over time.
Why Choose Us?
We specialize in crafting high-precision moulds tailored for transparent materials like acrylic or polycarbonate, ensuring flawless optical clarity and surface finish. Our advanced manufacturing technologies, including CNC machining and 3D printing, guarantee durability and dimensional accuracy. With a focus on innovation, we collaborate closely with clients to deliver customized designs that balance aesthetics and functionality. Competitive pricing, rapid turnaround times, and rigorous quality checks underscore our commitment to efficiency. Backed by years of expertise and a proven track record, we provide end-to-end support-from prototyping to after-sales service-to exceed your expectations in every project.
Customers' Feedback


